Professional Logo to PES Conversion: Flawless Stitching Starts Here
Whether you're creating custom uniforms, branded caps, or personalized merch, turning your logo into an embroidery design is a big step toward making your brand stand out. But here's the secret: flawless stitching doesn't start at the machineit starts with a proper PES file.
If youre using a Brother or Babylock embroidery machine, youve probably already seen the term PES pop up everywhere. Thats because PES is the file format these machines use to read and stitch your design.
But waitcan you just upload your PNG or JPG logo and press "go"? Not quite.
In this guide, well cover:
- What PES files are and why they matter
- The process of converting a logo to PES
- Common pitfalls (and how to avoid them)
- Professional tips to ensure flawless stitching
- The easiest way to get your logo digitized perfectly
Want to skip the hassle? Digitizing Buddy offers professional, affordable logo to PES conversion services, delivered fast and optimized for Brother and Babylock machines. You send the imagethey send back a clean, stitch-ready PES file.
What Is a PES File?
A PES file is a specific embroidery file format used by:
- Brother embroidery machines
- Babylock machines
- Some Deco models
This file doesnt just hold your imageit contains detailed stitching instructions:
- Where each stitch goes
- What stitch type is used (satin, fill, run)
- Thread color sequence
- Trims, jumps, and stops
- Hoop placement
In other words, PES files are the language your embroidery machine speaks. Feeding your machine the wrong format or a poorly digitized file can result in messy stitching, misaligned designs, or thread breakage.
Why You Can't Just Convert a JPG or PNG
Heres the thing: an image file like JPG, PNG, or even SVG is just pixels. Its visualnot stitch-based. Your embroidery machine doesnt see colors and outlines the way your eyes do.
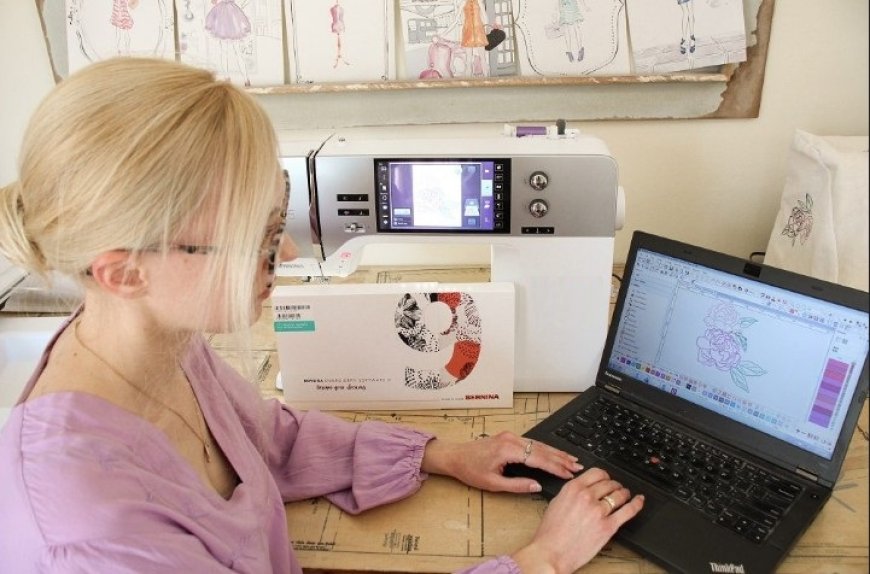
To turn your logo into an embroidery-ready PES file, it needs to be digitized.
What is Digitizing?
Digitizing is the process of converting a visual design into stitches. It involves:
- Mapping out stitch paths
- Choosing the right stitch types
- Adjusting density and angles
- Adding underlays
- Optimizing for fabric and hoop size
Its not an automatic processit takes skill, experience, and the right software.
How to Convert a Logo to PES: The Right Way
There are two main ways to get a logo converted to PES:
1. Use a Professional Digitizing Service
This is hands-down the fastest and most reliable method.
Digitizing Buddy specializes in converting logos to PES (and other formats). Their team manually digitizes your design, making sure it stitches cleanly on your specific fabric and machine type.
What you get:
- Machine-ready PES file
- Clean stitch pathing
- Professional-quality results
- Fast turnaround
- Free minor edits if needed
Ideal if you:
- Need the design for business branding
- Dont want to mess with software
- Want a polished, accurate result the first time
2. Use Embroidery Digitizing Software (DIY)
If you prefer to DIY it, here are some tools you can try:
|
Software |
Platform |
Best For |
Cost |
|
Hatch by Wilcom |
Windows |
Pros and serious hobbyists |
Paid (Free trial) |
|
SewArt |
Windows |
Beginners |
~$75 |
|
Ink/Stitch |
All |
Free, open-source enthusiasts |
Free |
|
Embrilliance |
All |
Simple edits, light digitizing |
Varies |
Note: Even with auto-digitizing features, its best to learn manual techniques over time to improve stitch quality.
Tips for a Perfect Logo-to-PES Conversion
Whether you go DIY or hire a pro, follow these guidelines for flawless results:
1. Start with a High-Quality Image
Use:
- High-resolution PNG or JPG (300 DPI+)
- Vector files like SVG or AI if available
- Clean, simple logos with clear contrast
Avoid:
- Low-res screenshots
- Blurry or overly detailed designs
- Watermarked or copyrighted images
2. Simplify Complex Designs
Embroidery works best with bold lines and limited colors. Try to:
- Remove gradients and tiny details
- Stick to 36 solid colors
- Enlarge small text (minimum 6mm tall)
Tiny text or intricate shadows just dont stitch well.
3. Choose the Right Stitch Types
Each element in your logo may require different stitch styles:
|
Design Element |
Recommended Stitch Type |
|
Text & borders |
Satin stitch |
|
Large fills |
Tatami or fill stitch |
|
Fine lines |
Run stitch |
Pro digitizers (like those at Digitizing Buddy) know exactly which stitch to use for each area.
4. Know Your Fabric Type
Digitizing isnt one-size-fits-all. Your logo needs to be digitized based on the fabric youll stitch on.
|
Fabric Type |
Digitizing Approach |
|
T-shirts |
Extra underlay, lower density |
|
Towels/Fleece |
Topping stabilizer, tighter fill |
|
Hats/Caps |
Center-out digitizing, bold fonts |
|
Denim/Canvas |
Standard fill and support |
Let your digitizer know the fabricthis ensures it stitches correctly and lasts.
5. Test Before You Stitch on Final Garments
Even the best PES file deserves a test run! Always test the file on a similar fabric to:
- Check color alignmen
- Spot any tension issues
- Make last-minute adjustments
Common Logo Digitizing Mistakes to Avoid
Avoid these beginner traps when converting to PES:
|
Mistake |
Result |
|
Auto-digitizing without review |
Uneven stitches, broken paths |
|
Using low-res images |
Blurry, inaccurate design |
|
Ignoring fabric type |
Puckering, distortion |
|
Overusing fill stitches |
Stiff, uncomfortable embroidery |
|
Resizing a PES file after digitizing |
Stitches get too dense or sparse |
FAQs: Logo to PES Conversion
Can I use Photoshop or Illustrator to make PES files?
No. These tools are for graphic design, not embroidery. You need embroidery software or a digitizing service.
What format should I submit my logo in?
A high-resolution PNG, JPG, or vector file (SVG, AI, EPS) is best.
How long does professional digitizing take?
Digitizing Buddy usually delivers in 1224 hours depending on complexity.
Can I resize a PES file after I receive it?
Minor adjustments are okay, but avoid major resizing. It changes stitch density and can affect quality. If you need multiple sizes, request each one to be digitized separately.
Final Thoughts: Great Embroidery Starts with Great Digitizing
Embroidery may look simple, but the process behind it is anything but. Turning your logo into a high-quality PES file ensures your stitching looks clean, professional, and long-lasting.